Need help in using our WordPress plugin?
These are samples on how to add the Ultimate GDPR & CCPA features and shortcodes.
Note
The plugin can check if the user viewing your site is from European Union by going to Ultimate GDPR & CCPA > Cookie Consent and activating/checking Check if user is from European Union.
Users that are not from the European Union will not be able to see Ultimate GDPR & CCPA features.
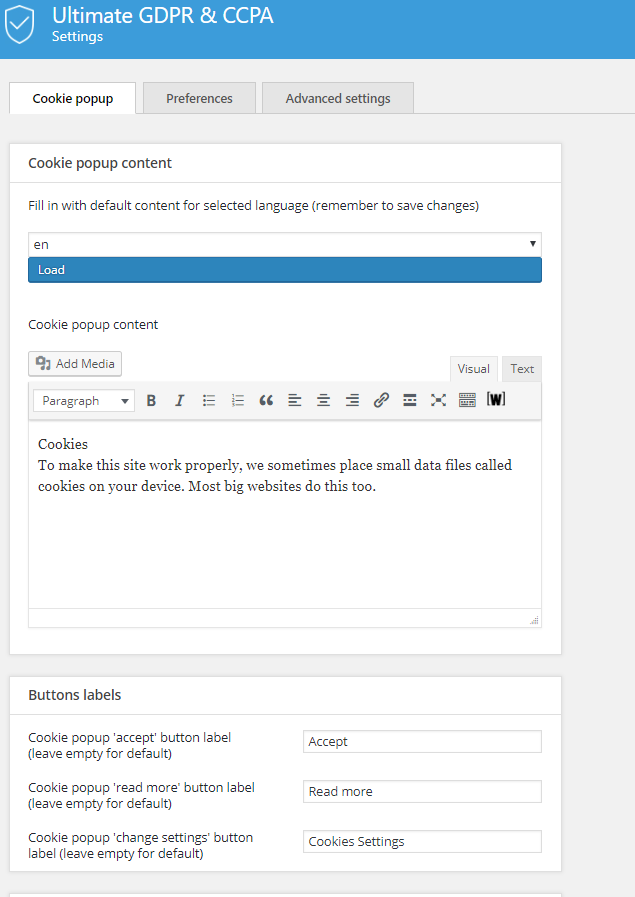
To add a cookie consent on the site, in your dashboard go to Ultimate GDPR & CCPA > Cookie Consent.
You will be redirected to the Cookie consent settings.
|
In Select pages to display cookie notice on, choose a page on your site that you will like to show the cookie notice.
Note
Display cookie notice on all pages if activated, will let you show the cookie notice in all pages until it is accepted.
Add the needed information and details. For more details on Cookie consent settings, click here.
Note
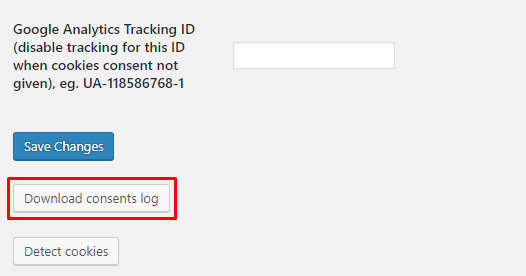
Admin can download consent logs for admin to know what consent the user gave for Cookie Consent. You can find the download button at the bottom of Ultimate GDPR & CCPA > Cookie Consent.
Set the Default Cookie Group
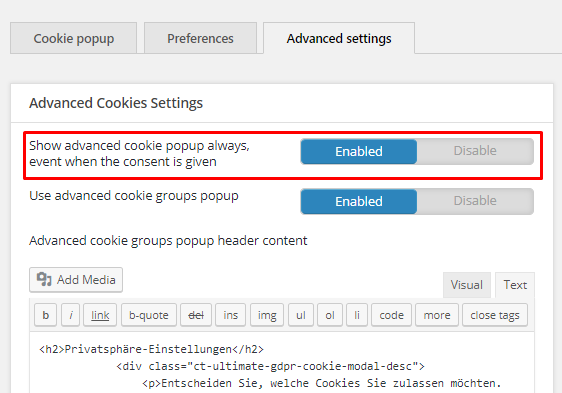
When the Change Settings button is clicked, it well show the Advance cookie setting and the Default Cookie Group selected.
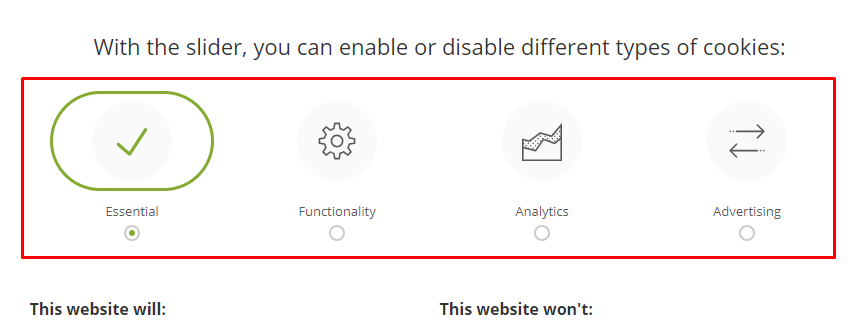
You can change the default cookie group in Ultimate GDPR & CCPA > Cookie Consent > Cookie consent settings > Select default privacy group
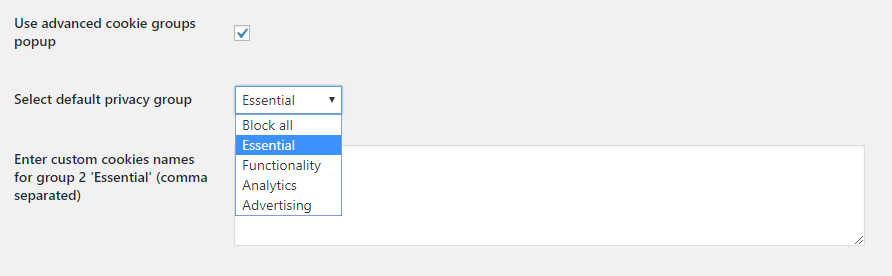
Show Privacy Settings Trigger
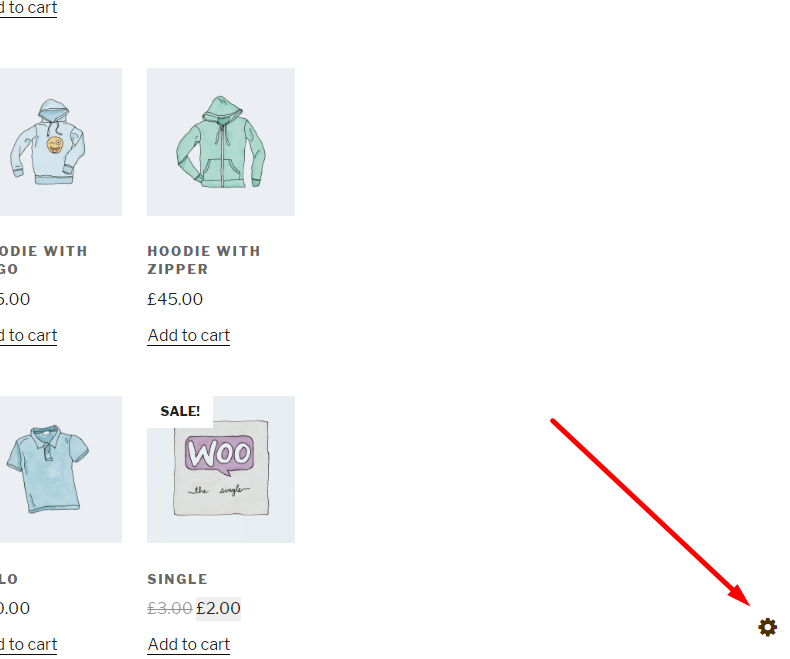
This Trigger will show the Advance cookie Settings even if it is already set. Users of the site can change the Advance cookie setting anytime they want by just clicking on the icon.
You can show this trigger when the Show advanced cookie popup always, even when the consent is given under Ultimate GDPR & CCPA > Cookie Consent > Advance settings tab is activated.
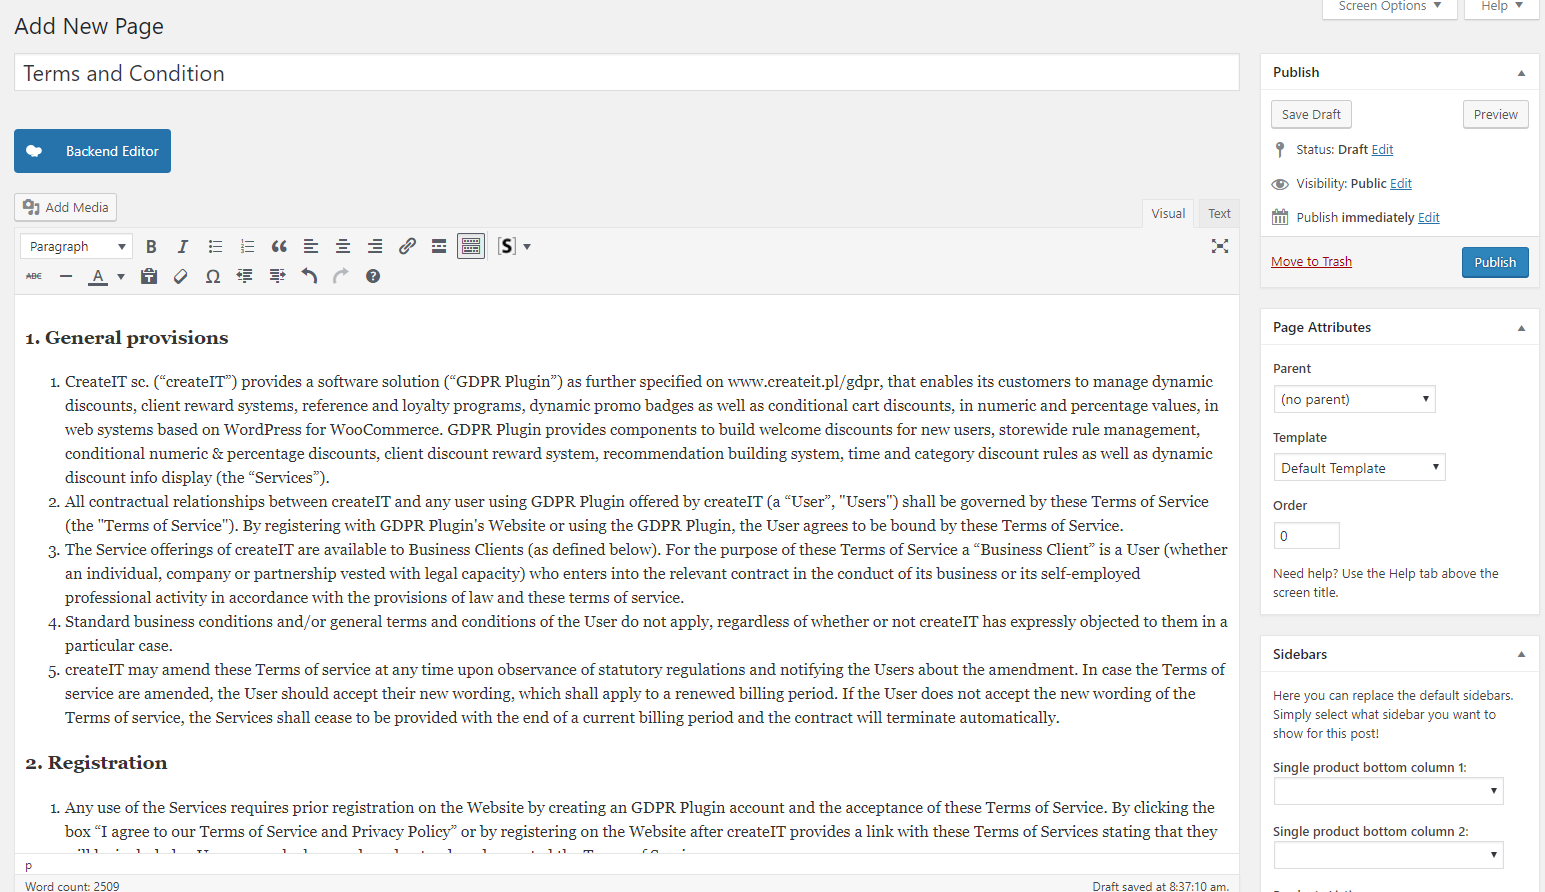
To add terms and conditions on the site, create a page where all the terms and conditions are written.
|
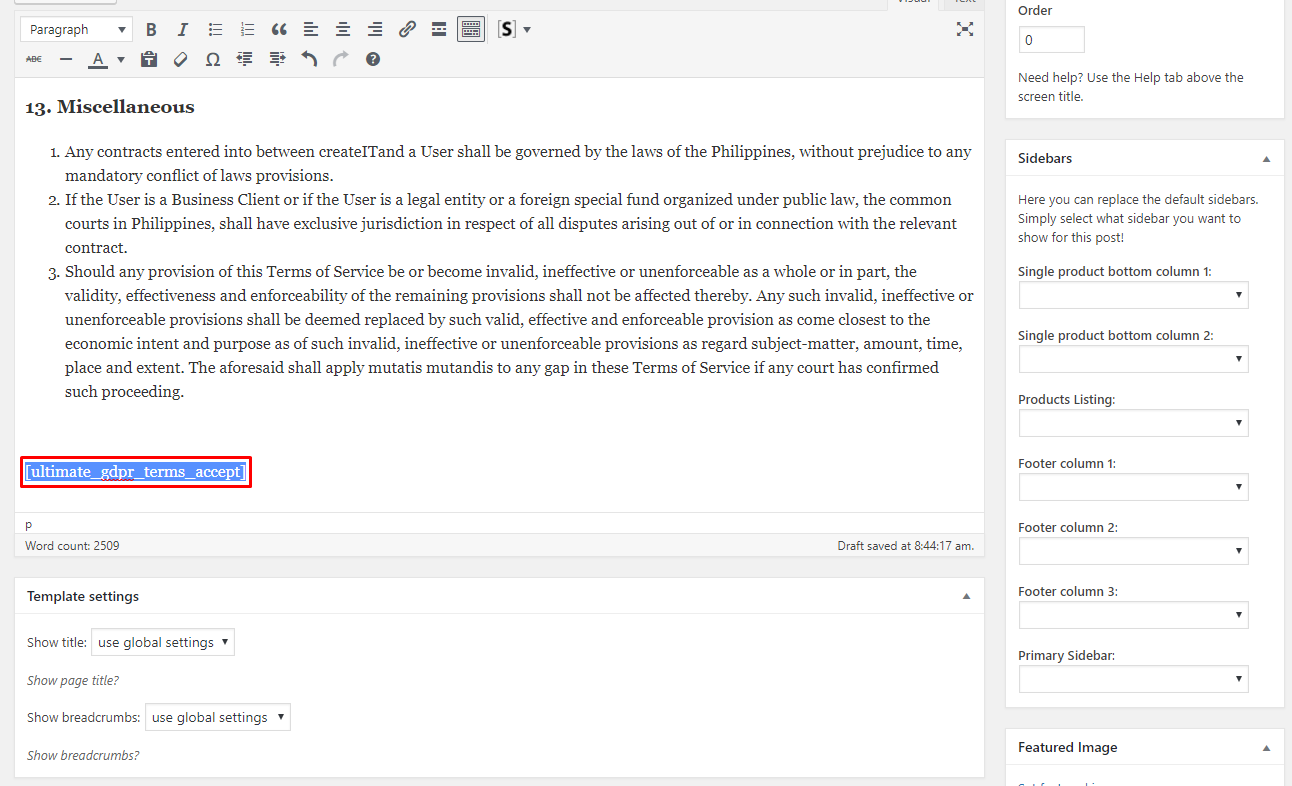
Add the button to accept the terms and condition, add the shortcode: [ultimate_gdpr_terms_accept]
|
After publishing the page for the terms and conditions, in your dashboard go to Ultimate GDPR & CCPA > Terms and Conditions.
You will be redirected to the Terms and Conditions settings.
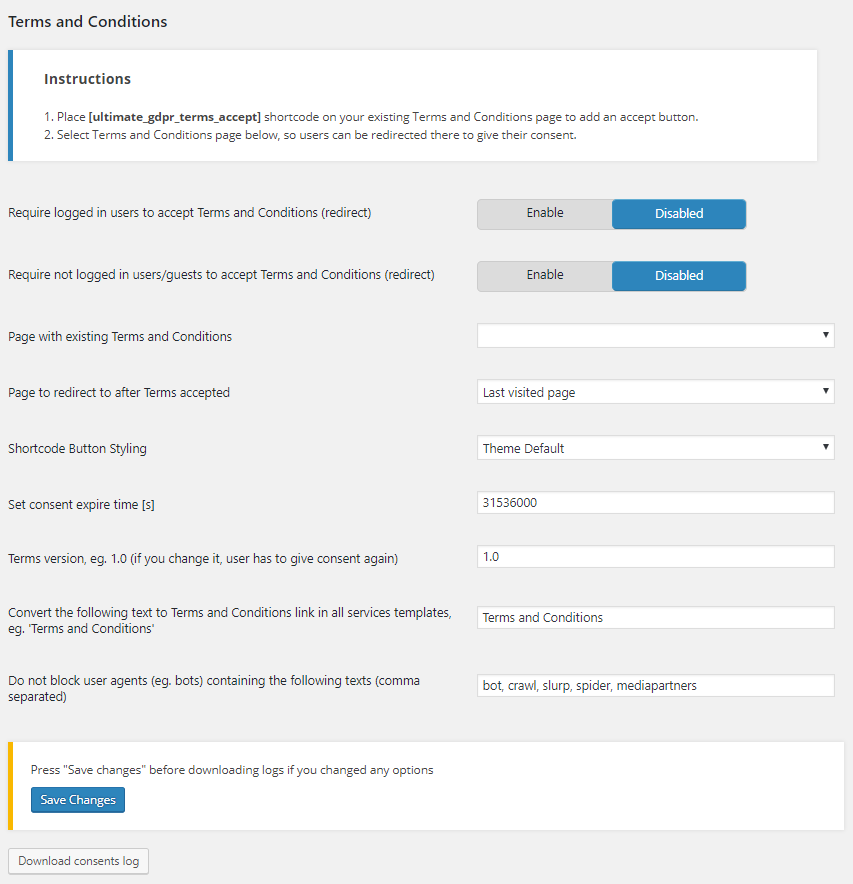
|
In Page with existing Terms and Conditions, choose the page that you made with the terms and conditions are written.
Add the needed information and details. For more details on Terms and Conditions, click here.
Note
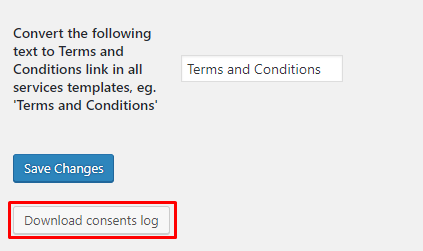
Admin can download consent logs for admin to know what consent the user gave for Terms and Conditions. You can find the download button at the bottom of Ultimate GDPR & CCPA > Terms and Conditions.
To add privacy policy on the site, create a page where all the privacy policy are written.
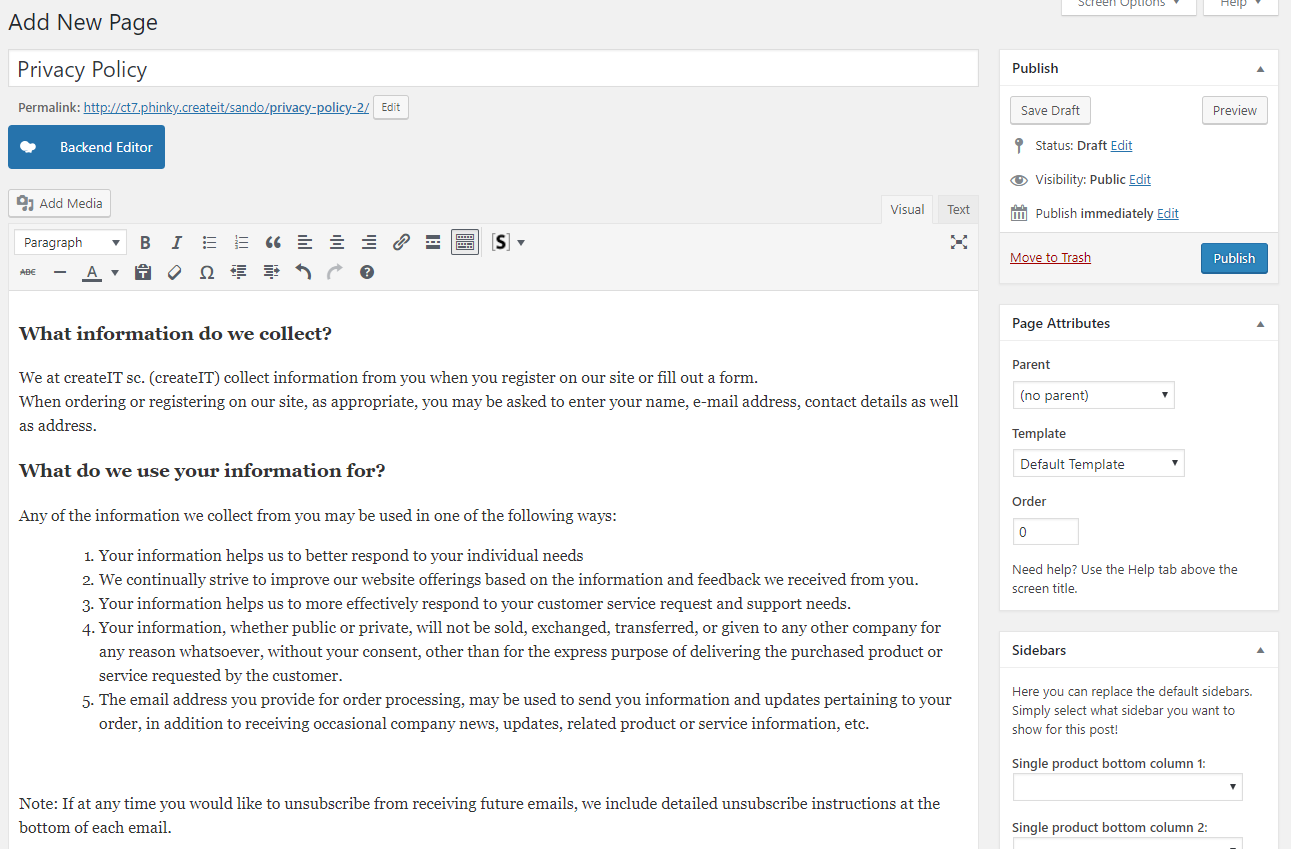
|
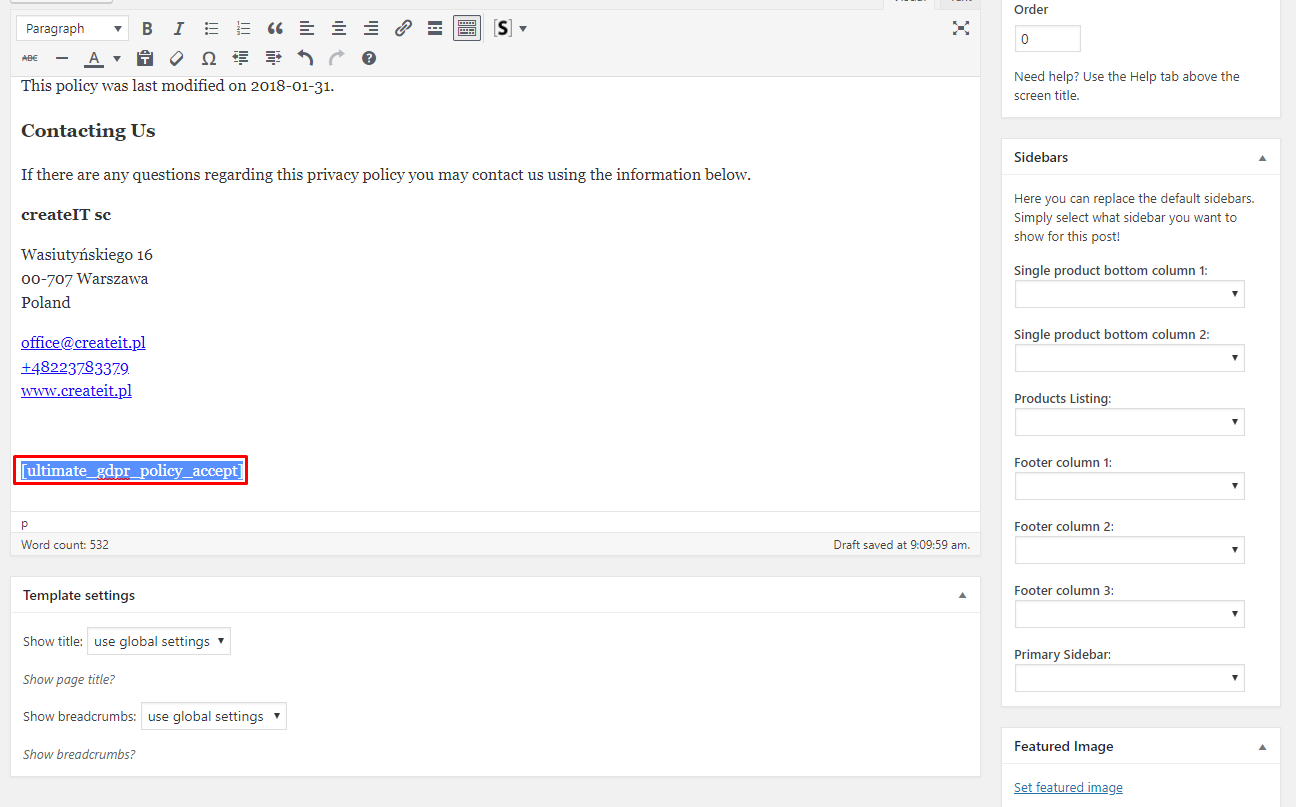
To add the button to accept the privacy policy, add the shortcode: [ultimate_gdpr_policy_accept]
|
After publishing the page for the privacy policy, in your dashboard go to Ultimate GDPR & CCPA > Privacy Policy.
You will be redirected to the Privacy Policy settings.
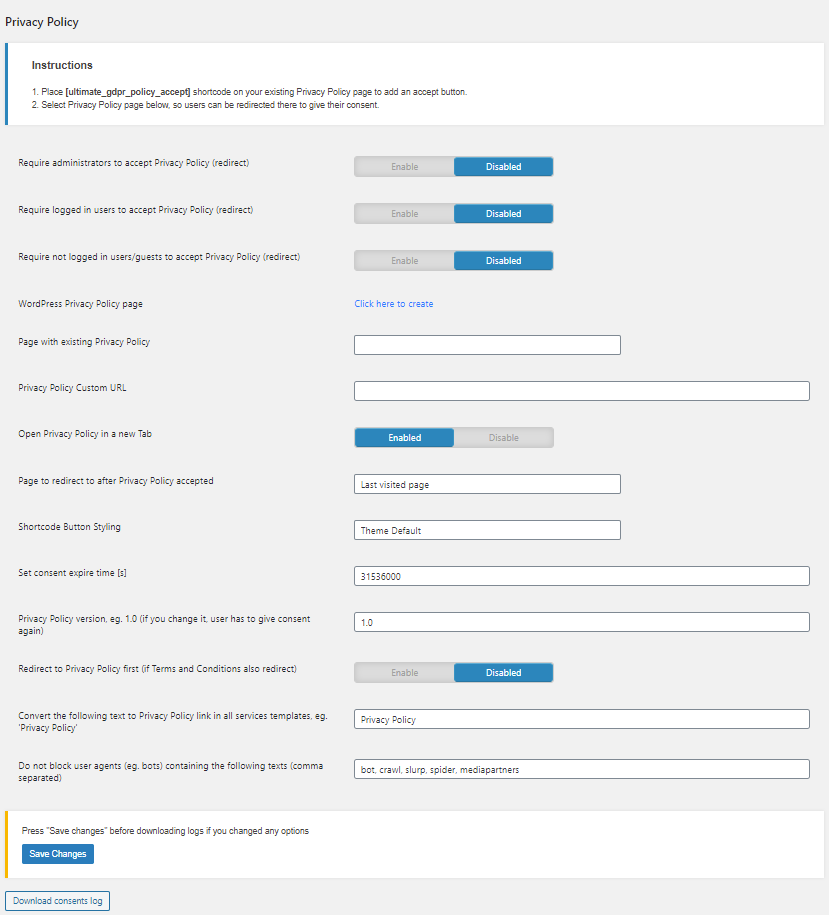
|
In Page with existing Privacy Policy, choose the page that you made with the privacy policy are written.
Add the needed information and details. For more details on Privacy Policy, click here.
Note
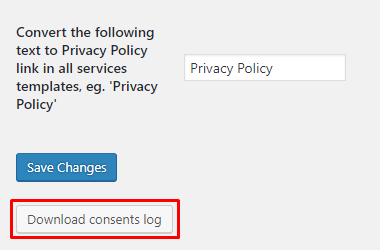
Admin can download consent logs for admin to know what consent the user gave for Privacy Policy. You can find the download button at the bottom of Ultimate GDPR & CCPA > Privacy Policy.
To add the Right to be Forgotten on your site, create a page where your want to show the Forget Me tab.
In the page you created, add the shortcode: [ultimate_gdpr_myaccount]
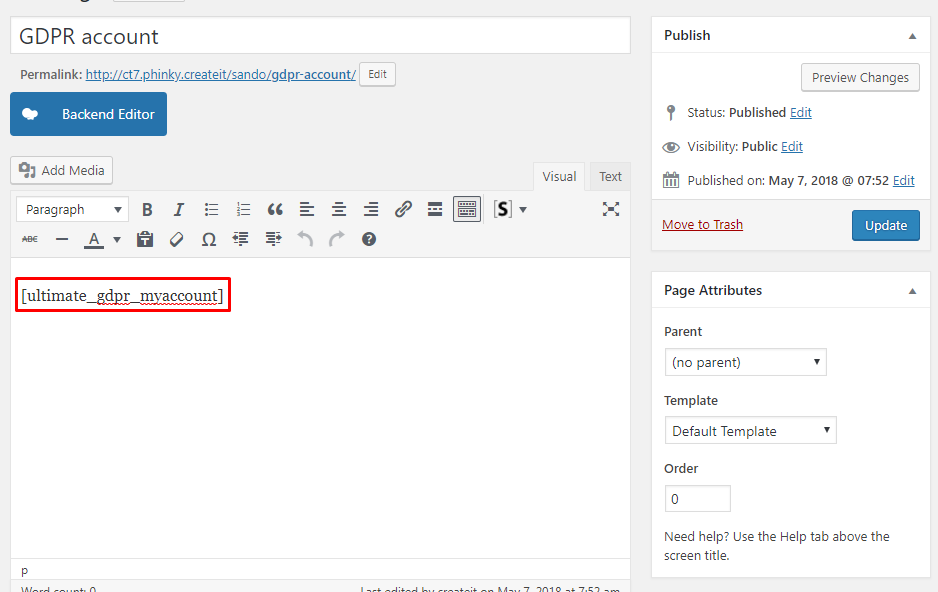
|
After publishing the page with the shortcode, in your dashboard go to Ultimate GDPR & CCPA > Right To Be Forgotten.
You will be redirected to the Right to be forgotten settings.

|
Add the needed information and details. For more details on Right To Be Forgotten settings, click here.
When a user sends a request, an email to confirm the request will be sent to the user.
Depending on the option set in the Right to be forgotten settings:
Automatically forget users who confirmed their mail is DISABLED
If the option Automatically unsubscribe users who confirmed their mail is disabled, the user must confirm the request in the email first for the request to be posted in the Right To Be Forgotten request list.

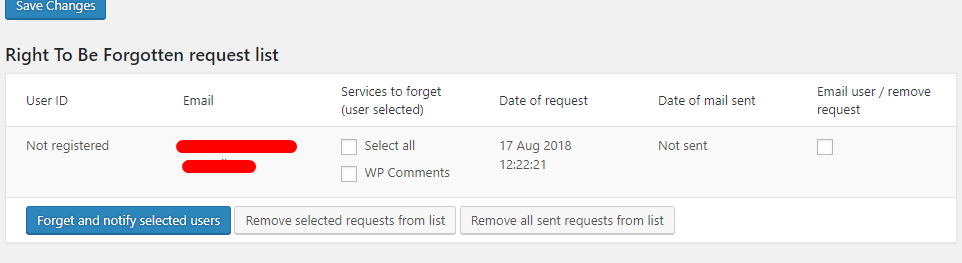
In the Right To Be Forgotten request list, the admin of the site have the option to approve or delete the request.
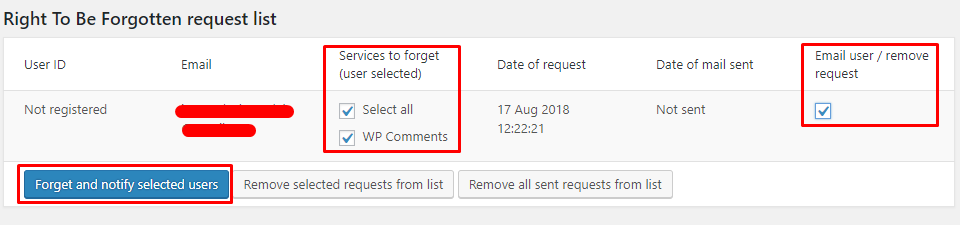
If the admin approves the request, select the services to unsubscribe the user from (these services are selected by the user for what services he would like to be forgotten). Then select the user you would like to forget by selecting the check box below Email user / remove request, then click the Forget and notify selected users button.
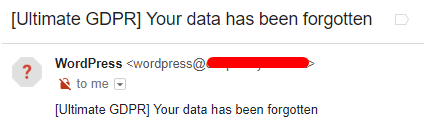
An email to notify the user that the request to be forgotten is approved.
Automatically forget users who confirmed their mail is ENABLED
If the option Automatically forget users who confirmed their mail is enabled, when the user confirm the request in the email the user will automatically be forgotten from the services the user have selected without any admin intervention.
The user request will be posted in the Right To Be Forgotten request list.
If the option Automatically send email about data removal to users who confirmed their email is enabled, once the user confirms the request in the email the user will receive an email to notify the user for the request to be forgotten.
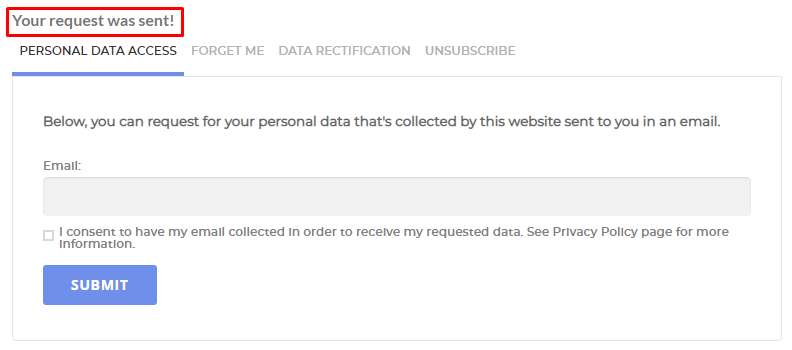
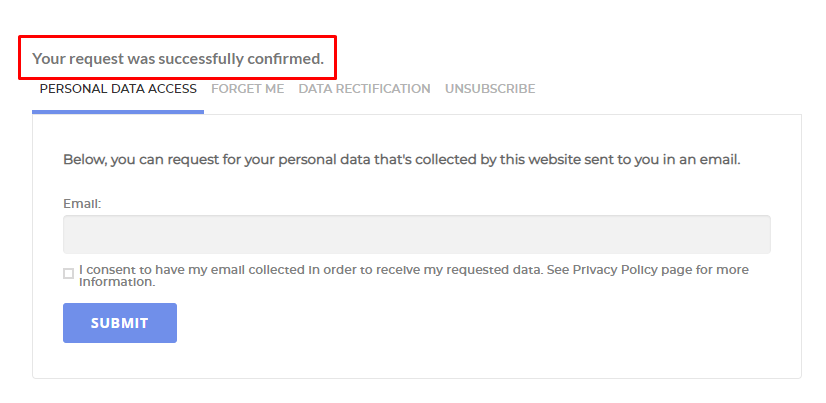
To add the Data Access request on your site, create a page where your want to show the Personal Data Access tab.
In the page you created, add the shortcode: [ultimate_gdpr_myaccount]
|
|
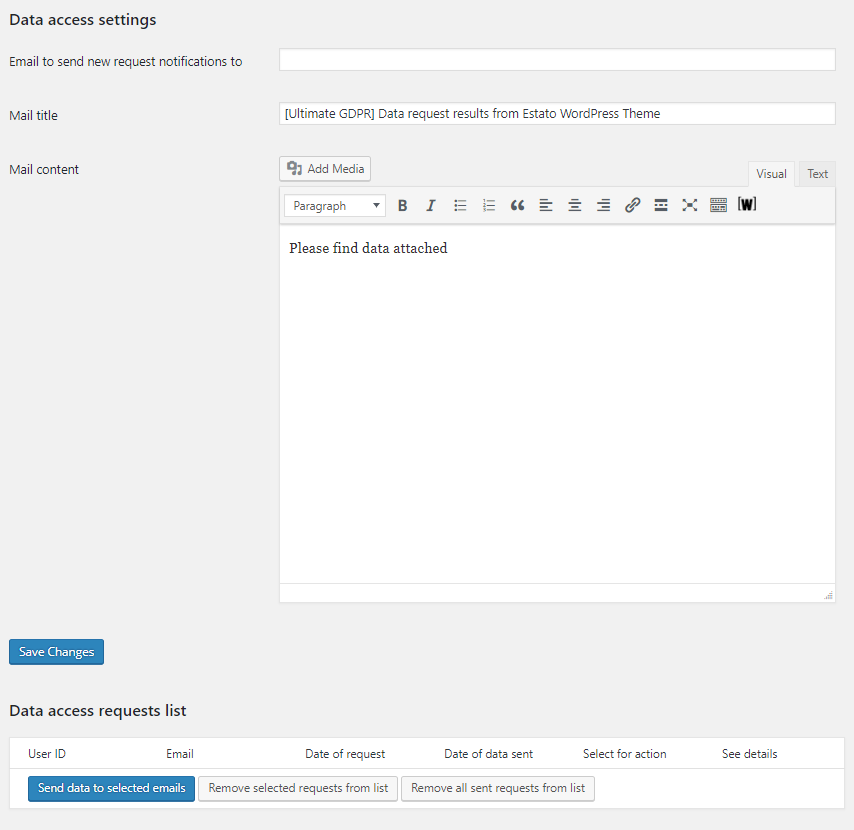
After publishing the page with the Data Access request, in your dashboard go to Ultimate GDPR & CCPA > Data Access.
You will be redirected to the Data access settings.
|
Add the needed information and details. For more details on Data Access settings, click here.
When a user sends a request, it is posted in Data access requests list.
An email with data attached will be sent to the user once the admin of the site selected the email of the user he would like to approve the request and clicked on Send data to selected emails button.
To add the Data Rectification request on your site, create a page where your want to show the Data Rectification tab.
In the page you created, add the shortcode: [ultimate_gdpr_myaccount]
|
|
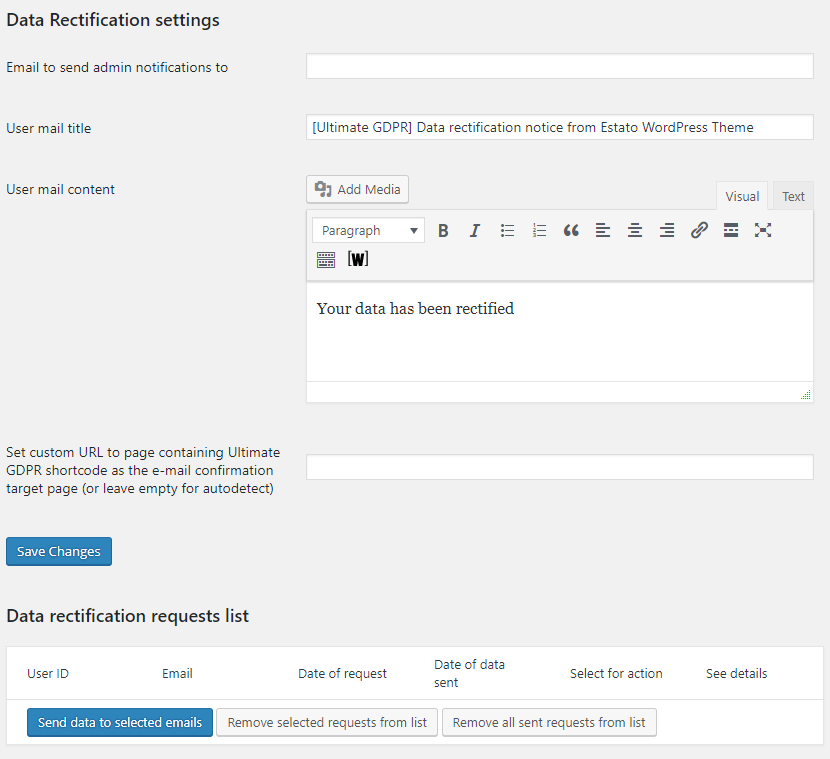
After publishing the page with the Data Rectification, in your dashboard go to Ultimate GDPR & CCPA > Data Rectification.
You will be redirected to the Data Rectification settings.
|
Add the needed information and details. For more details on Data Rectification settings, click here.
When a user sends a request, an email to confirm the request will be sent to the user. The user must first confirm the request before it is posted in Data rectification requests list.
An email to notify the user that the request is accepted will be sent once the admin of the site selected the email of the user he would like to approve the request and clicked on Send data to selected emails button.
To add the Unsubscribe request on your site, create a page where your want to show the Unsubscription tab.
In the page you created, add the shortcode: [ultimate_gdpr_myaccount]
|
|
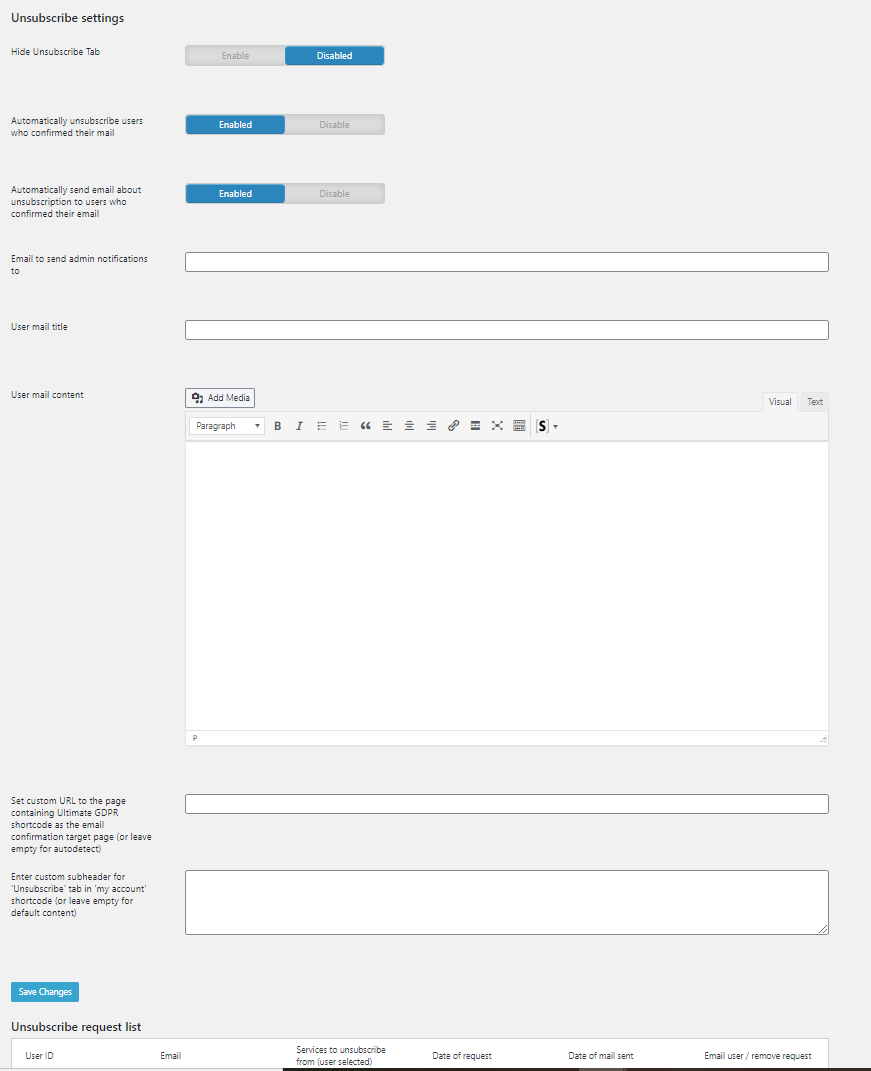
After publishing the page with the Unsubscribe, in your dashboard go to Ultimate GDPR & CCPA > Unsubscribe.
You will be redirected to the Unsubscribe settings.
Add the needed information and details. For more details on Unsubscribe settings, click here.
When a user sends a request, an email to confirm the request will be sent to the user.
Depending on the option set in the Unsubscribe settings:
Automatically unsubscribe users who confirmed their mail is DISABLED
If the option Automatically unsubscribe users who confirmed their mail is disabled, the user must confirm the request in the email first for the request to be posted in the Unsubscribe request list.

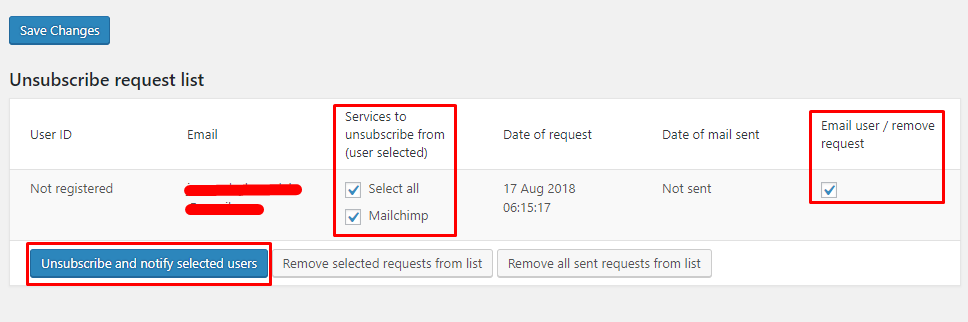
In the Unsubscribe request list, the admin of the site have the option to approve or delete the request.
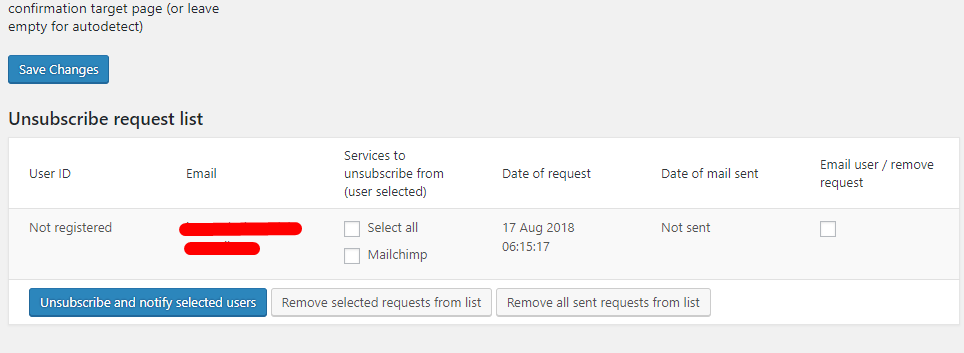
If the admin approves the request, select the services to unsubscribe the user from (these services are selected by the user for what services he would like to be unsubscribed). Then select the user you would like to unsubscribe by selecting the check box below Email user / remove request, then click the Unsubscribe and notify selected users button.
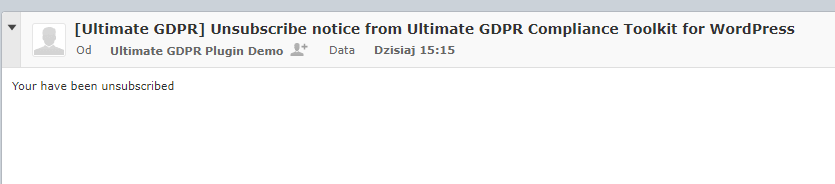
An email to notify the user that the request to unsubscribe is approved.
Automatically unsubscribe users who confirmed their mail is ENABLED
If the option Automatically unsubscribe users who confirmed their mail is enabled, when the user confirm the request in the email the user will automatically be unsubscribe from the services the user have selected without any admin intervention.
The user request will be posted in the Unsubscribe request list.
If the option Automatically send email about unsubscription to users who confirmed their email is enabled, once the user confirms the request in the email the user will receive an email to notify the user for the unsubscription.